Notching Can Be Done!
As the days have gone on, I've started to attempt to take on part of the Reclaimed Wood Wall. |
| I think he's bored of this project...... |
Step One
 | ||
| Hmmm....that doesn't look right.... |
Then look at the picture of it on your phone, and quickly realize um ya....that's like a quarter inch off that old adage "measure twice" totally makes sense. So let's try that again.
 |
| So much better! |
Ok, now we are notchin'!
Step Two
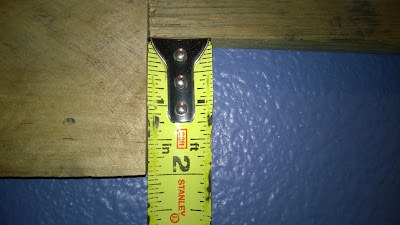
Now you are going to want to measure the depth of that overhang. That way when you cut out the notch you know how deep to cut. You will still have to adjust and shave a little off, maybe. For now this helps out though.
 |
| Don't forget to think it through, measure twice right? |
Step Three
Then, I take it onto the workbench to straighten the lines and square it up. One of my favorite tools is the triangle. It just works so nicely to help you get those lines nice and straight. |
| Follow the original mark you made to create a line all the way across the wood. |
 |
| Look at that beautiful line! oooo la la |
Step Four
Now that you have the line drawn across the entire plank (really this is more about using the triangle to draw straight) you are going to find the place to cut that line off. In other words you are only going to use part of that line. In fact it will be the depth of the notch right?
Measure down the line to the same depth of the other piece of wood. Repeat that measurement over and over and over again, as to neither confuse nor forget it. Make a mark in that location.
Once you have the this new mark, use your handy dandy triangle to draw another line across the wood, in a perpendicular fashion. The place where these two lines come together, or intersect, is going to be the corner of our notch.
Step Five
For me, I like to notch using a jigsaw. Its small enough to have decent control and I find it appealing because its pretty easy to maneuver. It's really important to pay attention to which way to notch. If you cut the wrong way then you will have it notched out int he opposite directions that you need. I've almost done this a few times and then actually done it once or twice, or five or six times. It's crazy frustrating.
Once I'm happily cutting I tend to really focus on the wood. The sound of the jigsaw and the small part peel of wood that twists and turns and winds its way above the wood as you cut. On this particular day, during this particular cut I realized it was almost time to pick up my kiddos. Clearly, I focused and making sure that all my cuts are in the right place. I'm cutting and thinking...what kind of day did the offspring have? Did the boy do well on his behavior chart? Did the girl get to practice Steel Drum band again?
Step Six
Now that you have cleanly cut out your notch, take it back to the wall. Accept that you may have to do some fine tuning, but it should basically slide into place, almost. And this is when I excitedly do the happy dance, knowing that once again I have made something beautiful.
 |
| Argh! What is that crap! |
Until I realize that I haven't made anything beautiful. I've totally screwed up.....again. HUMPH! I shall fix this...I will make it work....I will! So when you mess up like this, and you will, because this is so labor intensive, breathe, give yourself space. Rinse your brain off, and repeat! :) It always works the second time....almost always.

Ahhh yes! Cut THAT way....

Only THAT way


